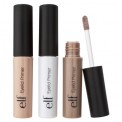
The Smoky Eye Effect
09.15.11
Season after season, the smoky eye proves to be an evolving force in beauty. Initially seen as a spicier, punk look, the smoky eye is now often paired with sweeter, classic looks. Whether spicy or sweet, when you see this technique done well it’s an absolute head turner. Lucky for us, it’s evolved into an extremely easy look to achieve with a couple simple tips and a few well-placed products. Cotton Candy contributor Rachael Perrin unveils how to get the perfect smoky eye.
No. 1
Remember, eyes before foundation. Whether a novice or a professional artist, you will almost always have a little pigment fall-off. If you’re taking the look from a.m. to p.m., use an eye shadow shield or hold a sponge under eyes when applying powder shadow.
No. 2
ALWAYS apply a water-proof cream or shadow base to cement everything. Create a shape from lash line to crease, with a sheer black or dark cream that lifts the eye up and out. Add a sheer shimmer or satin cream from above the crease to the brow bone, and in the inner corner of the eyes for a highlight that keeps eyes on the bright side. Then smudge the dark cream along your lower lashes to create your entire outline.
No. 3
Choose at least three shades of powder shadow, ranging from a deep dark to a nude. If you don’t have a drawer full of products at home, there are more smoky palettes and kits hitting retail shelves than lipstick shades this season. If your drawers are overflowing like mine, grab these items: a black or very dark brown, a dark metal or jewel-tone, a nude, and toss in a light shimmer.
No. 4
Paint by numbers. Apply the darkest shadow directly over the dark base, making sure to pack it heavily into the lash line using a smoky brush or pinky finger. Lightly smudge the dark shade along the bottom lash line. Stop at the inner edge of the iris to avoid erasing the shimmer on the inner corners. Then dust the light shadow over the entire light base. Finally, swipe the metal or jewel tone into the crease with a clean smoky brush.

No. 5
Now blend, erasing all hard lines between shades. Blend the crease shade slightly in both directions, with a fluff brush. Add more of the darkest shade, again smudging up and out, as needed. Avoid erasing your highlights, but add more if you do. Blending is the key to creating an airbrushed finish. When you’ve achieved the balance that makes you look like an amazing, modern version of a Robert Palmer video model – you’re done!
No. 6
As an option, line the inner rim of your eye with a water-proof black or deep shade to fill in lash line. Top it off with loads of black thickening mascara. If you’re building on a look from earlier in the day, try a lash lacquer which refreshes and bulks up your lashes – no falsies needed.
Final Note:
If you only remember three tips from this really detailed how-to, then: create your shape with base, add depth and highlights and blend baby, blend! It took me longer to perfect the smoky eye on my clients’ eyes than it did on my own. No matter eye shape or skin tone, remember you can do this.
Written by: Rachael Perrin
Perrin is a makeup artist and studio hair stylist with Artists by Timothy Priano and The Bridal Team Chicago. An admitted product junkie, Perrin’s work has been recently published in Cosmopolitan, Maxim, Good Housekeeping and Grace Ormonde Wedding Style, and a number of European publications.


